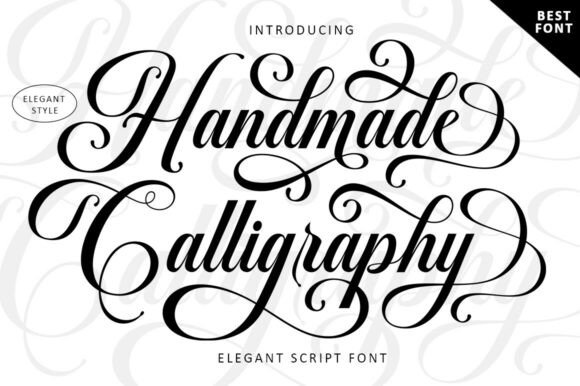
The envelope is the first thing a guest touches, and the place card is the last small detail they see at the table. Handmade Calligraphy is a hand-lettered style made for both. This guide covers addressing, place cards and the practical details that make them look professional.
➞ Download Handmade Calligraphy
The envelope sets the tone
Before a guest opens the card, the envelope has already said something about the event. Calligraphy on the front signals care and tradition, and it makes even a modest invitation feel considered.
Because printed lettering stays perfectly consistent, you can address a whole guest list in one style without the fatigue of writing every line by hand.
A clear addressing hierarchy
- Guest names. The line that benefits most from calligraphy, set largest and centered.
- Street line. A smaller size, in the same lettering if it stays legible.
- City, region and postcode. Keep this line clear and simple so postal readers can process it.
- Return address. Small, on the back flap or top left, in a plain typeface.
If an address looks cramped, simplify the lettering on the lower lines rather than shrinking everything.
Place cards and table names
A place card should be read at a glance by someone standing over a table. Set one name per card, centered, with ample space on either side.
Fold-over tent cards are a practical format: the name sits on the front, and the back can carry a meal choice code or a table number in small plain type.
Mistakes to avoid
- Script in all capitals. Calligraphic capitals are designed to open a name, not to spell it.
- Tilted or stacked baselines. Keep every line straight and aligned to a centre axis.
- Dark envelopes with dark ink. Test contrast on the real envelope before ordering.
Envelope blueprint
- Guest namesHandmade Calligraphy, large, centered on the front.
- Street addressSame lettering, smaller, if it remains clear.
- City and postcodeClean, simple type for reliable delivery.
- Return addressSmall, plain, on the back flap.
- Seal or stickerA small matching motif, centered on the flap.
Suggested color palette
A palette that flatters Handmade Calligraphy and keeps the whole suite cohesive:
Design pairing and styling tips
- Run a test envelope with the real ink and paper before you print the full list.
- Keep the delivery address highly legible; choose elegance for the names and clarity for the rest.
- Set one name per place card and centre it on a clear axis.
- Use deep sepia or charcoal instead of black for a softer, hand-penned look.
- Check every guest's spelling against your final list before printing.
Frequently asked questions
Is printed calligraphy as formal as hand-written calligraphy?
It looks very close at reading distance, and it is easier to keep consistent across a large guest list.
Should the whole address be in calligraphy?
It can be, but clarity matters most for mail. Use calligraphy for names and a simpler line for postal details if the address is long.
What size should place cards be?
A folded tent card is a common, practical choice. Whatever the size, keep one name per card and plenty of space around it.